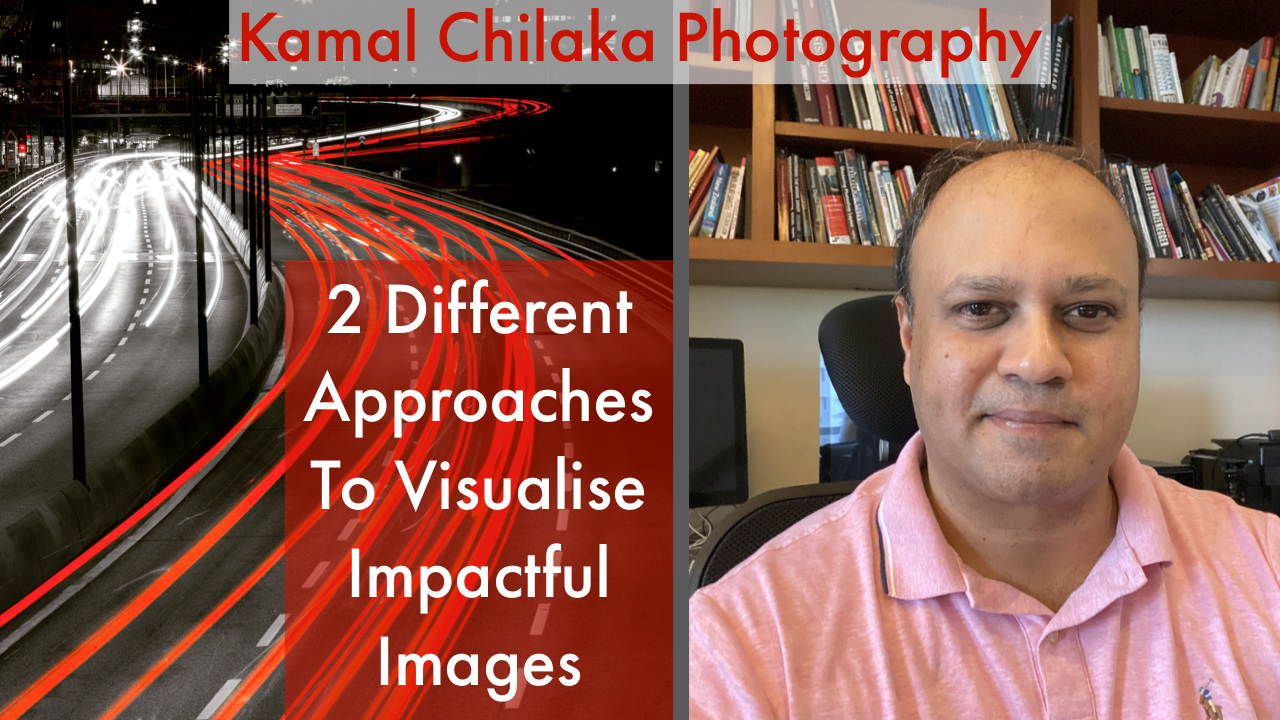
Visualising Techniques for Better Photography
In this video I share insights into the creative process. Specifically I talk about two different visualisation techniques I use to create high impact images.
This is a short livestream webinar based on my creative process. Streamed Live on Facebook on 24th May, 2020.


Exposure 101
What is Exposure in a photographic sense? It is the process of setting the correct Aperture, ISO and Shutter speed before releasing the shutter so as to get the desired look to the image.
The three settings ie Aperture, Shutter Speed and ISO are known as the exposure triangle.
What is Exposure in a photographic sense? It is the process of setting the correct Aperture, ISO and Shutter speed before releasing the shutter so as to get the desired look to the image.
The three settings ie Aperture, Shutter Speed and ISO are known as the exposure triangle.
These three setting determine the amount of light being received and being absorbed by the film or sensor at the time of shutter release.
Aperture is the extend to which the shutter is opened and is represented as below
f1.4 , f1.8, f2.0, f2.8, …………………………………..f8…………………….f16…………………..f22………..f32 etc
where f1.4 represents the largest aperture and f 32 the smallest.
Shutter Speed is the amount of time for which the shutter is kept open and is represented by
30 sec, 15 sec, 1 sec, 1/2 sec………………..1/60 sec, 1/125 sec, 1/250 sec……………….1/2000 sec, 1/4000 sec etc
where 30 sec is a lower shutter speed(ie shutter is kept open for a longer time) and 1/2000 sec is a fast shutter speed(ie shutter is kept open for fraction of a sec). The slower the shutter speed more light that will enter the camera.
ISO is the sensitivity of the film or sensor and is represented as
ISO 100, ISO 200, ISO 320, ISO 400…..ISO 1600, ISO, 3200………………..ISO 64000 ETC
where ISO 100 is the lowest sensitivity and ISO 6400 is the higher sensitivity.
When you have camera with manual controls you can see these setting on the camera itself or within the menu system. Learning to control these setting is the key better photography. In Automatic mode the camera decided the setting itself based on the meter reading and sets the correct reading for a averagely bright subject.
Look at the set of images below. They are all exactly the same image except for their exposure. There is a 4 stop difference between the first and the last image. For the moment it suffices to understand that every 1 stop difference is is double or half the amount of light depending on whether you are increasing or decreasing the light. As you can see below by changing your settings of the Exposure triangle you can control how the end image looks.
Dynamic Range : Dynamic range is the range of brightness and darkness a photographic medium such as film, digital sensor, or a print paper can capture while still maintaining detail without overexposing(going pure white) or underexposing(going pure black)
Film traditionally had a dynamic range of 5 stops. Modern camera sensors have dynamic range of 10 to 14 stops which is incredible. So in theory you can have a 10 stop difference in brightness between highlights and shadows in a screen and you can still capture detail in both areas. The built in histogram in your camera is a great tool to ensure that your image is not over or under exposed.
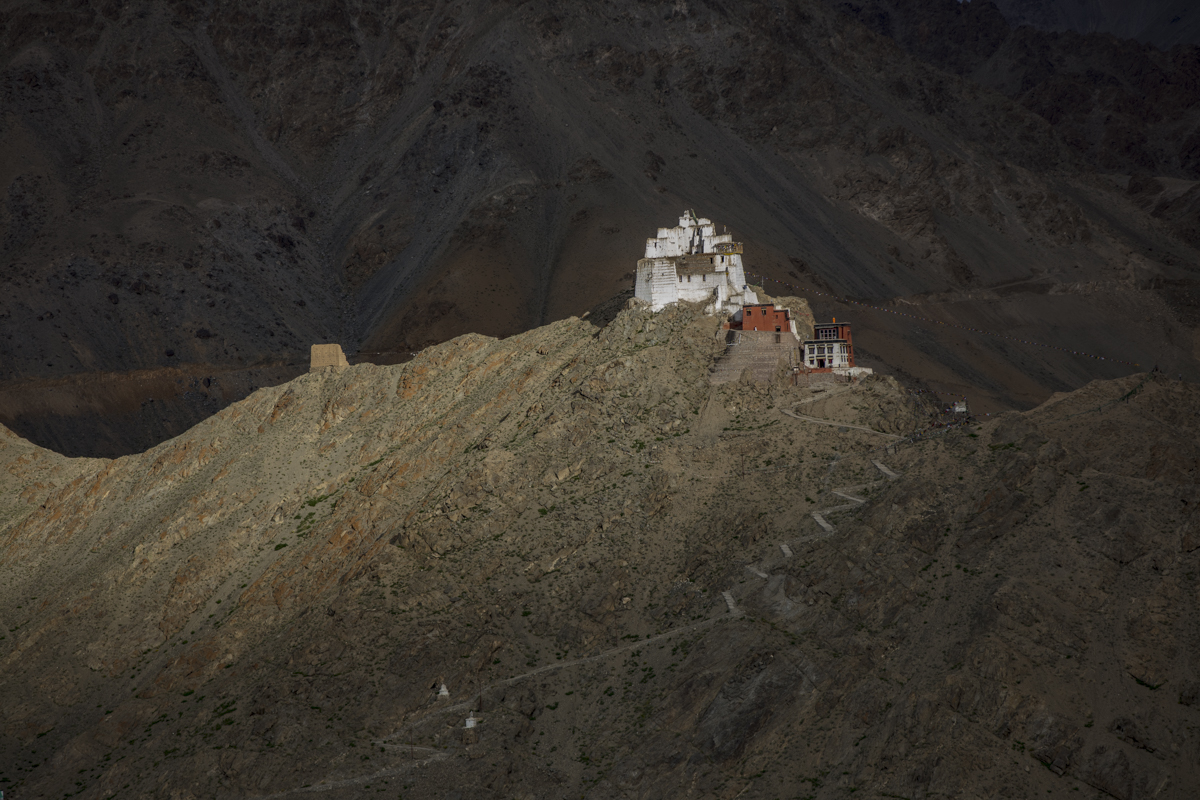
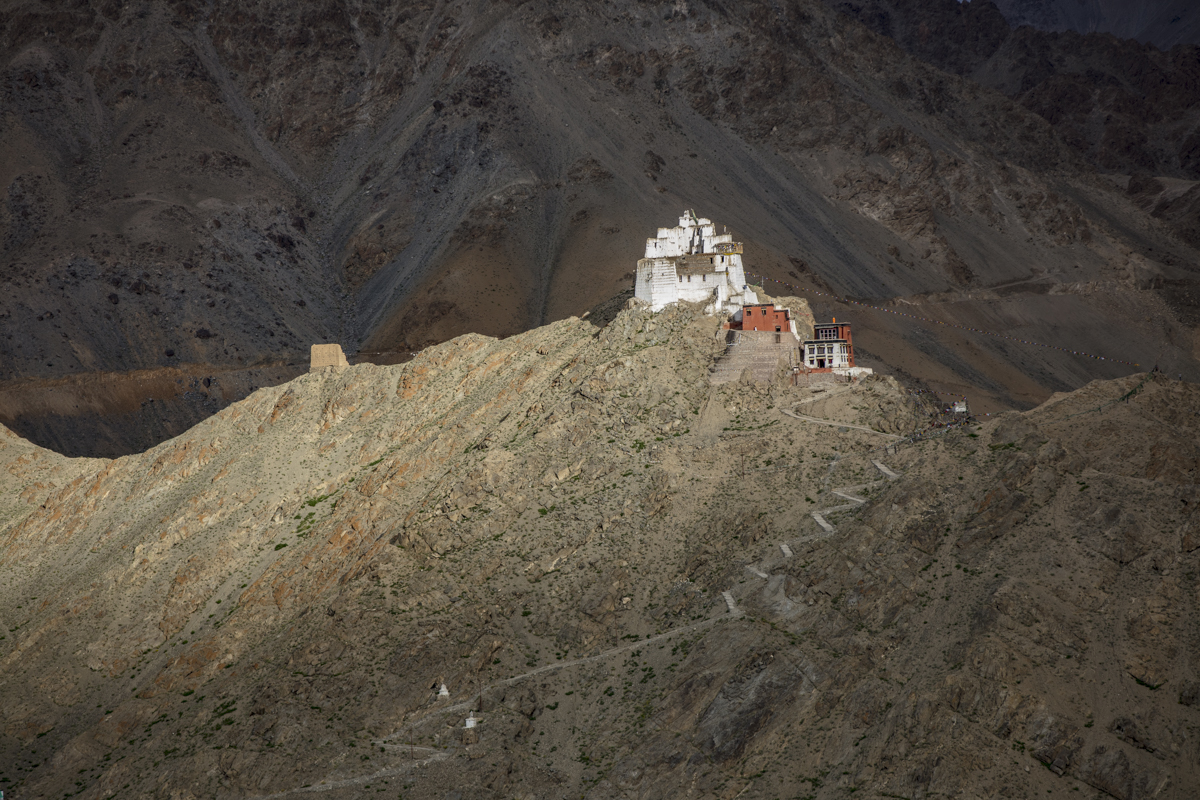
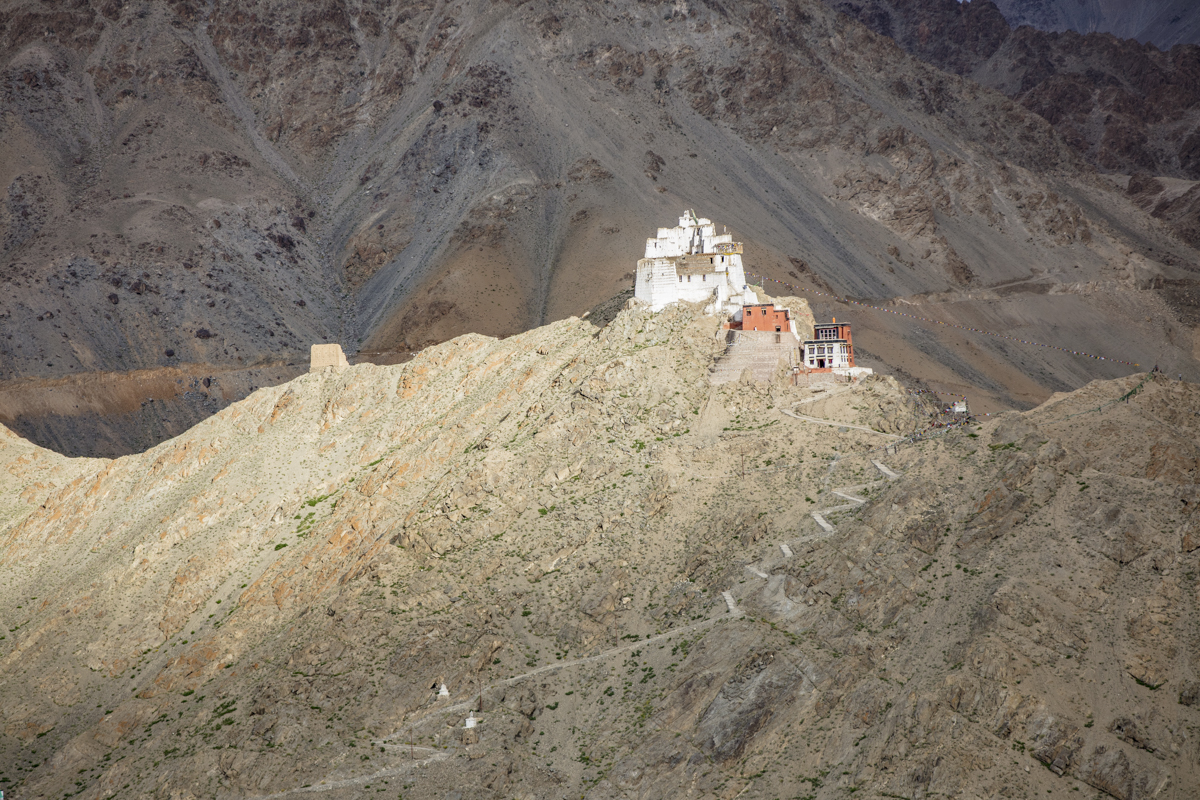
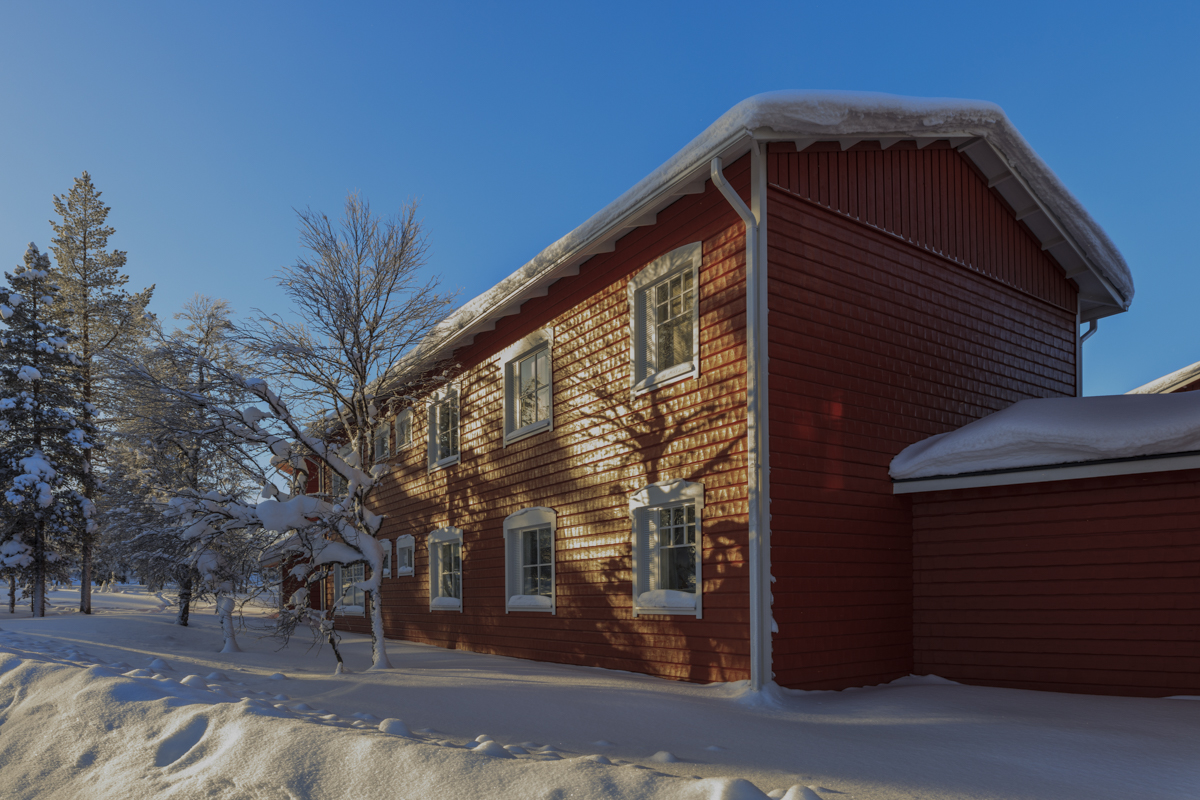
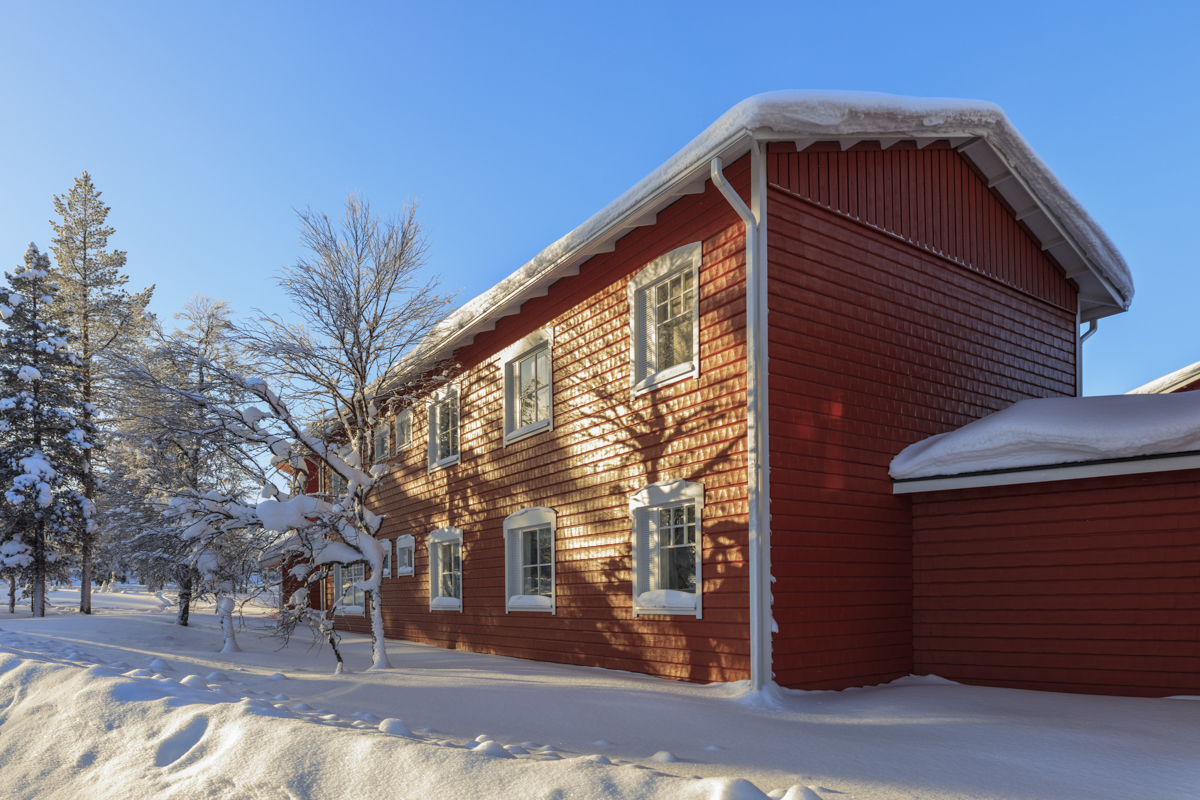
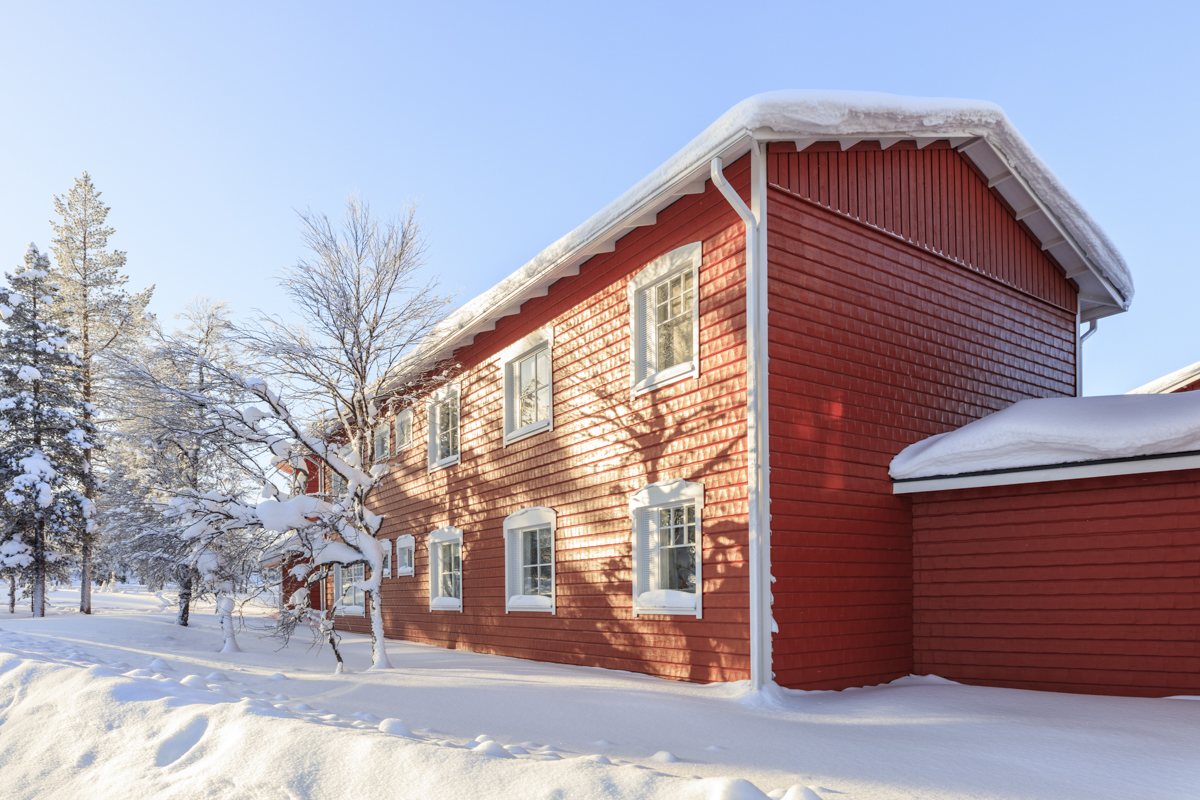
See another set of examples below of this scene from my trip to Finnish Lapland.
Any of these exposures could have been a technically correct exposure but a difference of 1 stop can really make one image the one in the centre stand out from the other two.
With modern cameras and smartphones getting a decent exposure is not a big problem anymore with a bit of trial and error. But if you are serious about your photography then you should be bale to get the correct exposure without taking your eyes of the viewfinder. A proper understanding of exposure and a lot of practice is required to be able to capture a great image. This is the foundation for creative photography.
For one on one sessions or small group workshops contact me Kamal Chilaka on +91 8778336918 or mail me at kamal@eyemage.photography .

Getting Sharp Photographs
Photographers have always strived for Sharpness in their images. Over the last few decades high quality lenses and cameras have helped with that goal. But nothing can replace good technique for best results.
There area number of things the photographer can do to ensure maximum sharpness in the photograph…
Photographers have always strived for Sharpness in their images. Over the last few decades high quality lenses and cameras have helped with that goal. But nothing can replace good technique for best results.
There area number of things the photographer can do to ensure maximum sharpness in the photograph.
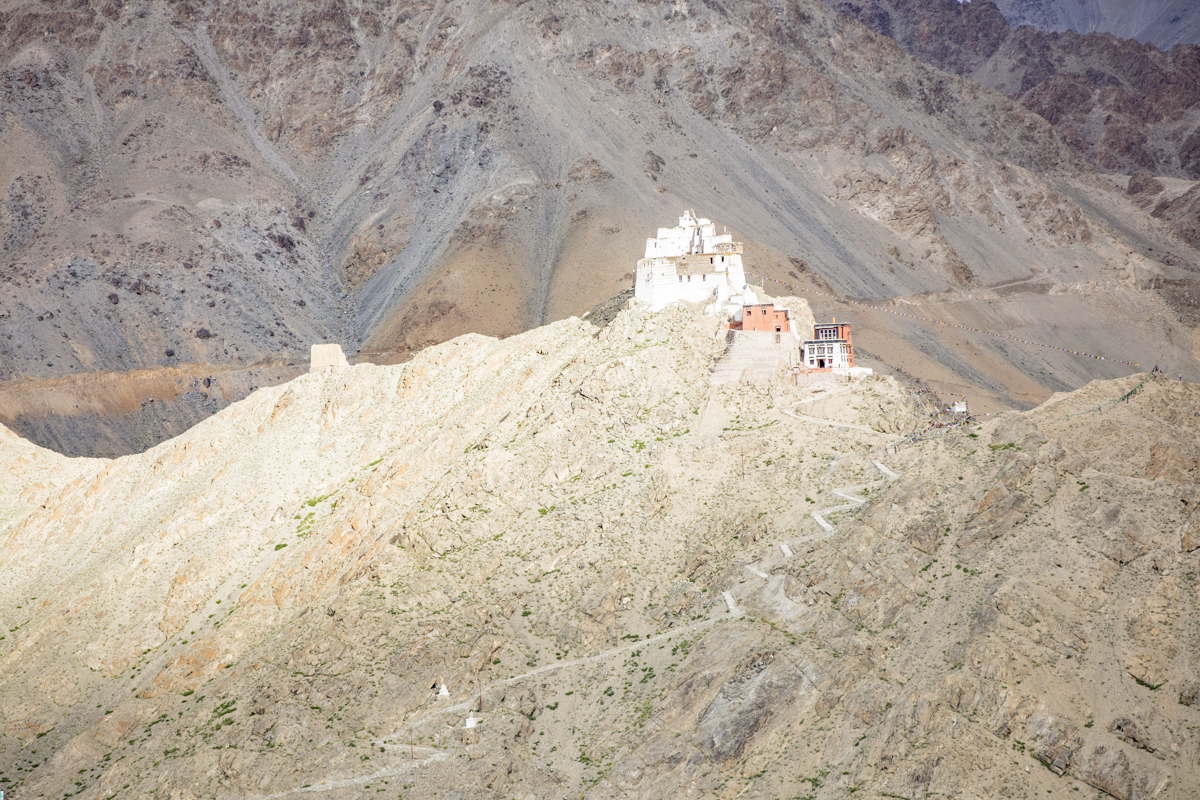
Ladakhi Girl Portrait. Eyes are in sharp focus.

Using a Tripod. - If there is any one single tool that can help achieve the best results..that is a good tripod combined with a good tripod head.
Proper Technique ;
a. Using the correct aperture settings to get the desired depth of field and thereby a sharp subject.
b. use a shutter release or the built in timer on 2 second mode when using the camera on a tripod to. prevent camera shake.
c. Use a fast enough shutter speed specially when shooting handheld. I would recommend at least 1/250th of a second till you gain experience on shooting at lower shutter speeds.Be balanced and still while releasing the shutter. Correct technique in the field will prevent a lot of disappointment later.
c. Hold the camera firmly with one hand while you squeeze the shutter release rather than jab or poke at it to prevent camera shake if shooting hand held.
3. Use a good quality lens . Keep the from and back elements of the lens clean . Also keep the sensor safe from dust. change lenses in a safe and windless environment.
Practice shooting good shooting technique till it become second nature to you. This will allow you take consistency sharp pictures which can be printed and enlarged and still look good.
For one on one sessions or small group workshops contact me Kamal Chilaka on +91 9884845744 or mail me at kamal@eyemage.photography .
Basics of Photographic Composition
Anyone can take a photograph which captures a a scene or a situation ..specially today with almost everyone carrying a smart phone. Most people can learn how to take a photograph with a DSLR . Today photographs are being taken at an unprecedented scale and speed. How you make your images stand out in this situation. How can you make your images more pleasing, more impactful and more meaningful?
Anyone can take a photograph which captures a a scene or a situation ..specially today with almost everyone carrying a smart phone. Most people can learn how to take a photograph with a DSLR . Today photographs are being taken at an unprecedented scale and speed. How you make your images stand out in this situation. How can you make your images more pleasing, more impactful and more meaningful?
The answer to all these questions is better composition !
What is Composition? Every time you take a photograph you make a bunch of decisions knowingly or unknowingly. These decisions impact how the image comes across to the viewers. What are these decisions?
what to include in the picture and what to leave out?
What lens focal length should I use? Should I go wide or should I zoom in close?
What perspective do i take the picture from? Low? Eye level? high?
Where do i place the primary subject(s) of the image within the frame?
What position should i shoot from in relation to the subject? near or far?
There is no right or wrong answer to any of these questions. It all depends upon what exactly you as the photographer would like to communicate. But there are some principles you can apply based on the collective wisdom of the photographers and artists who have come before you to create more pleasing and impactful images.
Let’s look at some of these principles now.
Fill the Frame
Rule of thirds
Leading Lines
S Curves
Filling the Frame :
Very often beginner photographers tend to err in this aspect. They tend to to shoot from too far away or with too wide a focal length so the subject ends up being not so prominent in the final image. Pause a moment to think what the actual subject is and get in close if possible or use a longer focal length and fill the frame with your subject. This one basic method will give you more impactful images.
Lets see an example of what I mean.

In the image above the Pelican is very small in the frame and therefore has less impact. But in the image below by filling more of the frame with the pelican the image has more impact.
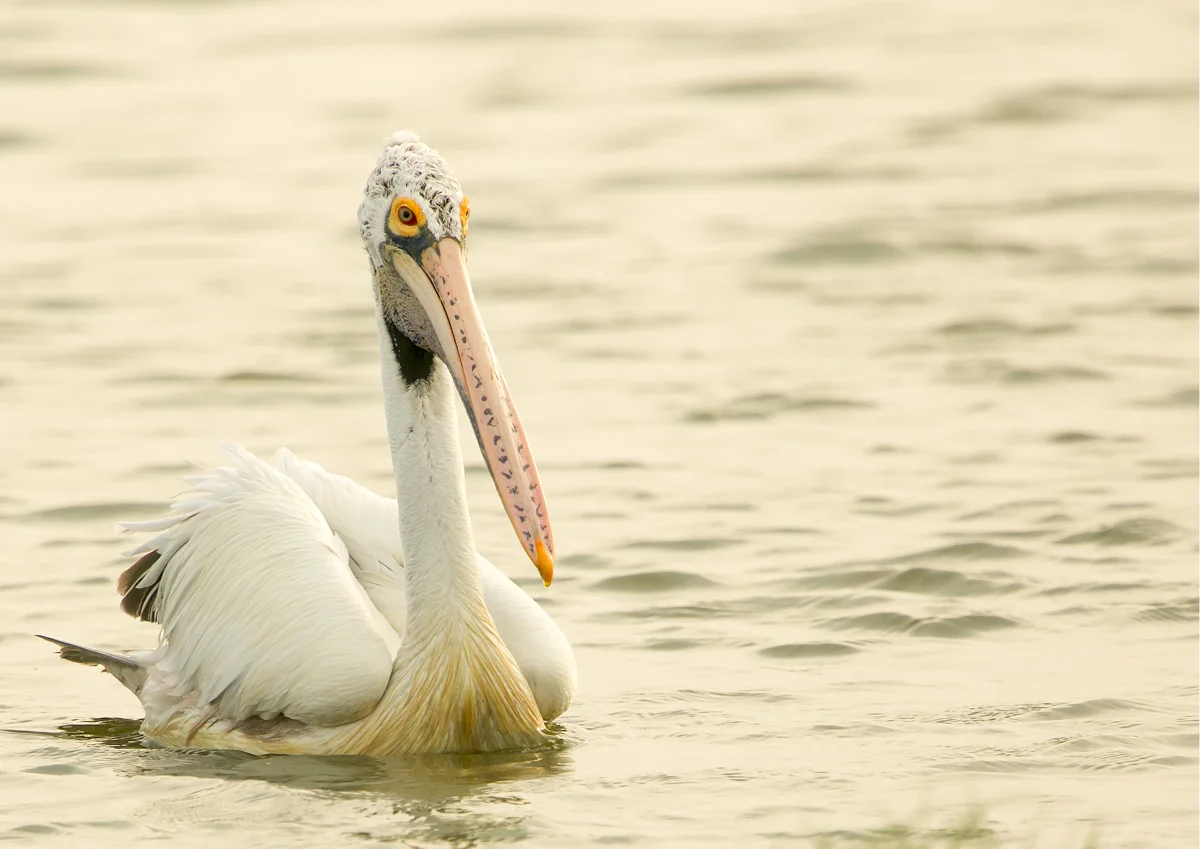
Here the subject occupies more of the frame without getting too close to the edges to crop the image but at the same time there is enough background information.
2. Rule of thirds
There is a tried and tested method to get more pleasing images. This method has been adopted by Artists and photographers for ages to create more drama and interest in images.
One of the fundamentals of painting and photography, the Rule of Thirds is a technique designed to help artists and photographers build drama and interest in a piece. The rule states that a piece should be divided into nine squares of equal size, with two horizontal lines intersecting two vertical lines.
Here in this photograph you can see what i mean.
The first image is shot without applying the rule of thirds. The second image has been cropped using the using the rule of thirds keeping the people and the dog in the point of intersection
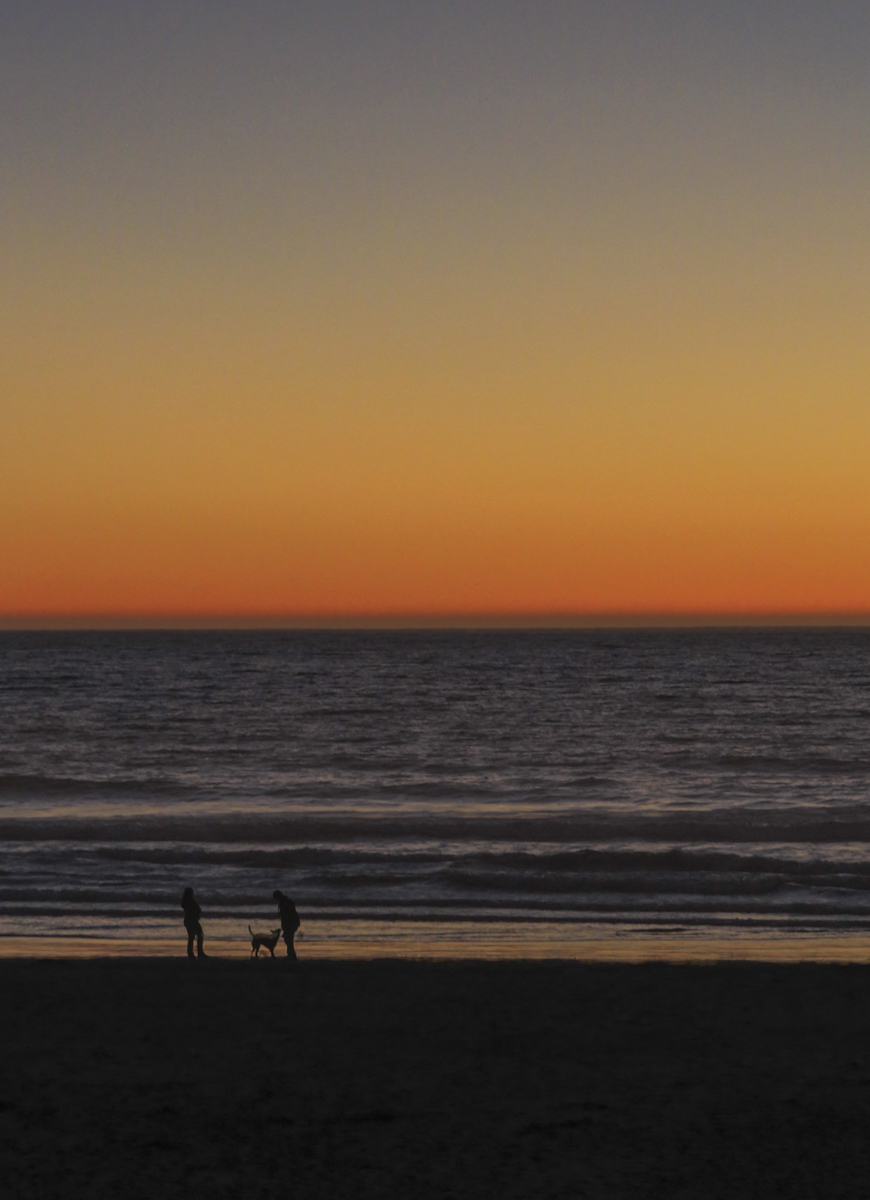
Without Rule of Thirds

Using the rule of thirds..can be done in camera using the built in guidelines or in post processing
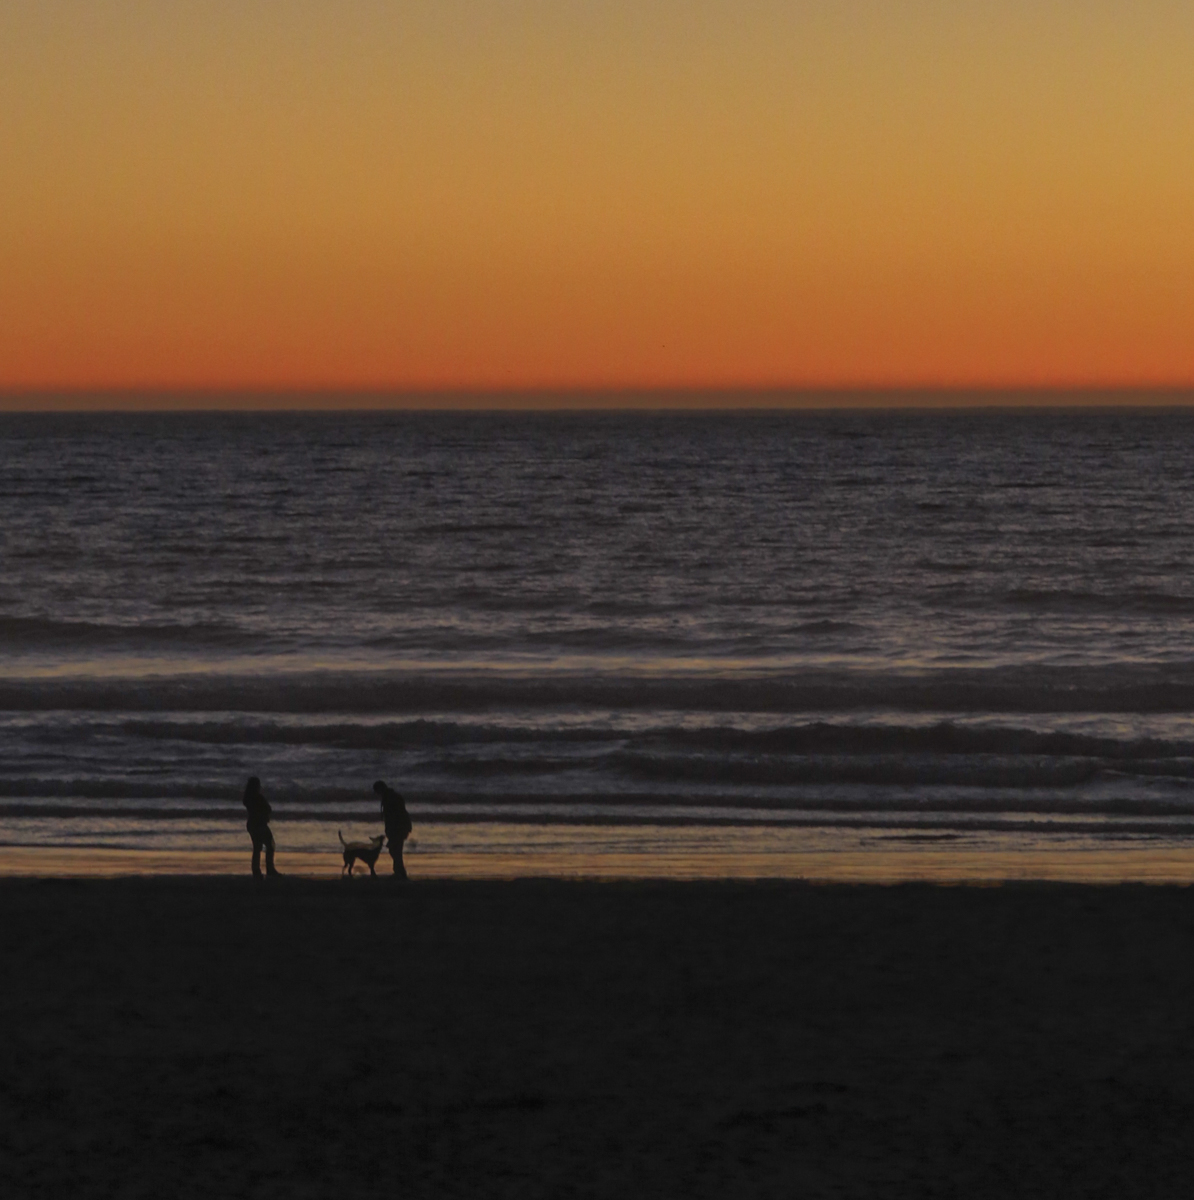
Although the first image is nice enough the image which uses the rule of thirds seems to have more drama , is cleaner and therefore more impactful. But just as with all photographic “rules” this too can be broken and a good image still achieved.but the photographer needs to that with deliberation.
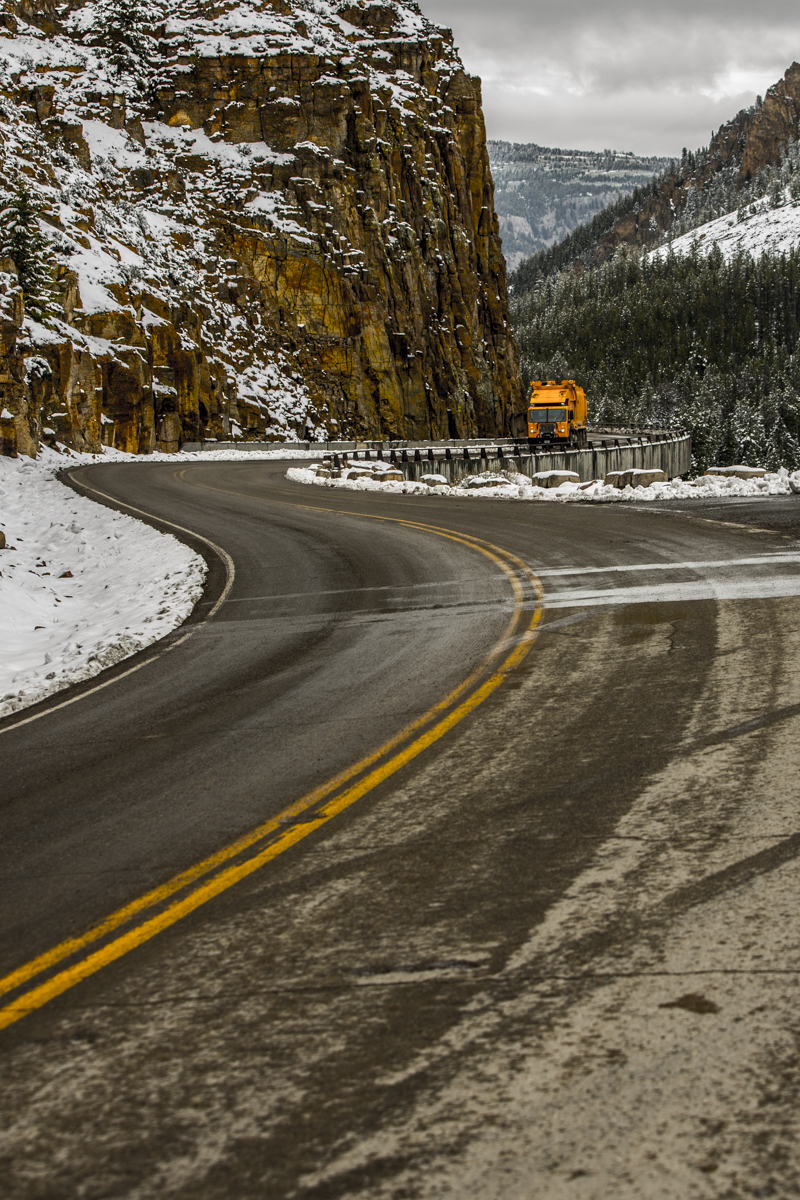
3. Leading Lines
It is one of the aims of the photographer to lead the eye of the viewer into the image and keep it there as long as possible. Leading lines are one of the tools available to the photographer to achieve that. Sometime these lines are strong and obvious ,sometime these are more subtle. In the image below the edges of the pier lead the viewers eyes into the centre of the frame towards the boats.
See how you can use leading lines during your next photography excursion.

Pier at Lake Wanaka, New Zealand
4. S Curves
S curves are a specific form of leading lines which can be found in both the natural and man made worlds. They create interest and drama and bring in an element of surprise if there is a well placed subject along the s curve. Here are couple of examples below.

Drive along Lake Pukaki, NZ
Now that you are aware of these compositional tools you can start using them in your photography.